Equipment To Make Your Own Kombucha
You may be considering brewing kombucha at home, but aren’t sure what equipment you need.Thankfully, the list for making kombucha supplies isn’t high-tech. In fact, it’s quite simple and only requires a few things. We put this list together to make getting started brewing that much easier. Here is the equipment you need to make your own kombucha at home.
Page Contents
Kombucha Brewing Kit
Looking to get started with minimal fuss and as soon as possible?
We recommend a speedy start with a kombucha starter kit! Or check out individual supplies below.
Starter Kits | ||
 |  |  |
Pros: 1. Simple and clear instructions 2. Heating mat for SCOBY! 3. Affordable ($) Cons: 1. Bottles not included | Pros: 1. Everything you need 2. Affordable ($) Cons: 1. None | Pros: 1. Simple and clear instructions 2. Detailed measurements 3. Affordable ($) Cons: 1. None |
 |  |  |
Pros: 1. Everything you need 2. Screw-cap bottles 3. Affordable ($) Cons: 1. Thin cloth cover | Pros: 1. Continuous brew 2. Kombucha on tap 3. Recipe book! 4. Affordable ($$) Cons: 1. None | Pros: 1. Continuous brew 2. Kombucha on tap 3. Big batch brew 4. Four kombucha tinctures! 5. DVD video instructions! Cons: 1. Pricey ($$$) |

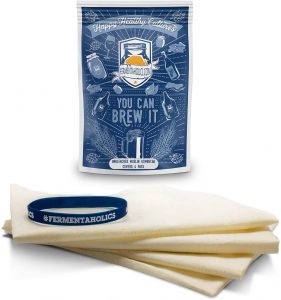
Kitchentoolz Kombucha Starter Kit (Deluxe with Heating Mat)
The first kombucha brewing kit I tried is the Kombucha Starter Kit from Kitchentoolz.
Before buying, I had no idea what fermentation meant. I only know that’s the process needed to make my kombucha at home.
But the instructions that come with this kombucha starter kit are so to the point and simple that it’s hard for a beginner to screw up.
The kit comes with all that you need – SCOBY, starter liquid, tea leaves, sugar, jar, pH test strips and even a heating mat. So when it’s winter, your SCOBY won’t feel cold and can continue fermenting.
The only thing that you need are bottles to store your booch in when it’s ready to drink.

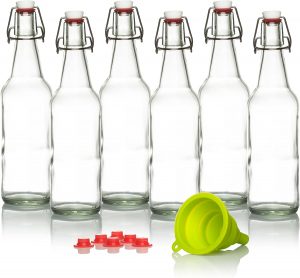
Joshua Tree Kombucha Deluxe Starter Kit
This kombucha deluxe starter kit from Joshua Tree comes with everything that you need to home brew kombucha.
Unlike most starter kits that only include 1 cup of starter liquid, this one comes with 1.5 cups.
Also, it contains six airtight flip-top glass bottles, organic tea, 1 cup organic cane sugar, 1-gallon glass kombucha jar with a plastic lid, muslin cloth cover, secure band, pH test strips, and even a temperature gauge.
When you have everything you need to make kombucha, there is no excuse not to make it.

Bucha Brewers’ Deluxe Kombucha Starter Kit
I have gifted my friends with SCOBY’s ever since I got this kombucha starter kit from Bucha Brewers. Maybe it’s because the SCOBY they sent me is so thick and healthy.
This kit comes with all the ingredients, jars, and bottles that you need to start home brewing kombucha.
But what sets it apart from the others is they included every measurement, i.e., the temperature of the water and the proper pH.
In addition, the instructions are clear, non-ambiguous, and concise. And for a limited time, this kit includes second fermentation flavoring ingredients. How awesome is that?
Craft A Brew Starter Home Brewing

Do you know the stress that comes with ordering ingredients and equipment from different stores?
You will not experience that when you get this Craft A Brew Starter Home Brewing.
It comes with everything you need, and when I say everything, that includes stainless steel funnel and filter, unlike other brands.
Also, the bottles that come in this kit are screw-cap. I find screw-caps are better than flip tops because sometimes SCOBY forms in the rubber part of the flip tops. The box is also adorable and artsy.
The only thing I don’t like about this kit is the cloth cover for the jar. It’s too thin and flimsy. Better to re-use old clothes you have.
Mortier Pilon – Kombucha Starter Kit with SCOBY

Mortier Pilon makes excellent and cute jars.
I bought this kombucha kit because of that. This kit comes with a 5-liter jar with a faucet, perfect for continuous brew kombucha or when you want kombucha on tap. It also comes with two flip top small jars.
Moreover, you get a book with 45 recipes that make use of kombucha tea!
The downside of this kombucha starter kit is the SCOBY that comes with it is small and thin.
Of course, that doesn’t matter much since you get enough starter liquid, which has all the bacteria and yeast you need to brew kombucha. But a bigger SCOBY will ferment tea faster.
Get Kombucha’s BREWMASTER SELECT Kombucha Continuous Brew Kit System

Want kombucha on tap?
This continuous brew kombucha kit from Get Kombucha will give you that.
It comes with a 2.5-gallon porcelain vessel with a plastic spigot. So you can get kombucha from it right away. Since it is 2.5-gallon, it’s perfect for making large batches of booch.
Since it’s for big batch making, you get two SCOBYs, seven packs of loose leaf tea blends, two packs organic cane sugar, and the other basics you need to brew kombucha.
But what’s cool about this kit is the DVD video instructions and four kombucha tinctures, including a kombucha facial toner!
Making kombucha is not as difficult as it used to be. Now, you can easily find a kombucha brewing kit so you can start home brewing. So, choose from these starter kits and start brewing your booch in no time.
Essential Equipment You Need to Brew Kombucha
Essential Equipment You Need to Brew Kombucha | ||||
 |  |  |  |  |
 |  |  |  | |

Brewing Vessel
Your best bet is to go with a 1-gallon glass jar with a wide mouth.
This is the tried and true method for homebrewing. The size is accessible for novices and the wide mouth helps make cleaning a breeze.
Glass is the safest material you can use when brewing kombucha. For beginners, we recommend avoiding jars with a spigot. You won’t need it with the “batch brew method” that we teach anyways.
Avoid metal and plastic at all costs.
Plastic is easily scratched and provides a great place for bad bacteria to hide and ruin your batch.
Metal and plastic may also contain chemicals that could leech into your brew due to the high acidity level of kombucha.
The only metal we recommend using is food-grade stainless steel (usually 304 or better). However, this is normally too pricy for the novice home brewer.
Some home brewers have also reported success using ceramic vessels. If you choose this route, make sure the glaze is food-grade to prevent potential contact with lead.
If you are just getting started, save yourself the headache and go with a glass jar. After your first batch, it will be possible to brew two batches at the same time. We recommend getting two 1-gallon glass jars to save some money.
Cloth Cover
You will need to cover the mouth of your brewing vessel with something that´s breathable (allows airflow) but prevents any bugs and fruit flies from entering.
A cotton cloth, dish towel, coffee filter, or old t-shirt will do the trick. Just make sure whatever you are using is washed and clean!
Don’t use materials like a cheesecloth, as many have wide enough holes that insects can pass through. If your brewing vessel came with a screw-on top, do not use this during the first fermentation. Air must freely pass through.
Bottles
When it comes time for the second fermentation (when you add flavor and carbonation to your kombucha), you will need some sealed, airtight containers.
We highly recommend flip-top bottles designed to stand the pressure that will build from carbonation. Avoid using the decorative flip-top bottles you find at many big-box stores. They can and will explode if used improperly.
Another good option is to use recycled store-bought kombucha bottles (BPA-free plastic or glass).
Mason jars may work, but they usually aren’t 100% airtight and prevent the development of good carbonation.
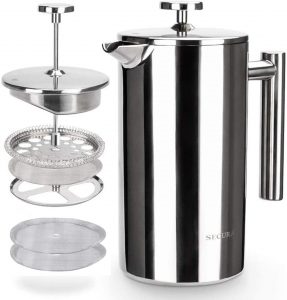
French Press or Pot
To brew kombucha, you first have to boil water and steep some tea. A french press is a great option to easily filter out the tea leaves after steeping, but a normal kitchen pot works well too.
If you use a pot, you will need a…
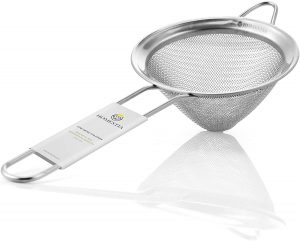
Strainer
This is a great way to filter out the loose-leaf tea you steep and to filter out fruit pulp or build-ups of yeast before the second fermentation.
If you want various sizes of filters, we recommend this kit.

Funnel
When you finish your first fermentation, the next step is to bottle your kombucha.
A funnel makes it so much easier to pour your kombucha (and fruit puree or juice!) from the brewing vessel into each bottle. This one comes with a removable strainer and fits perfectly in glass bottles.

Loose-Leaf Black Tea
Tea is the primary ingredient of kombucha.
Our brews tend to ferment best when we use loose-leaf, organic black tea. However, if you want to use tea bags, that will work too!
While the word “tea” is now used to refer to several different plants, the true “tea” plant is Camellia Sinensis. Black tea, green tea, oolong tea, and white tea are all leaves from this plant. The only difference among them is how they were processed and the amount of oxidation. Herbal teas without Camellia Sinensis aren’t actually teas, but rather tisanes or herbal infusions. Generally speaking, kombucha is brewed with pure tea.
We highly recommend sticking with black tea for your first few times brewing, as it handles longer steeping times better than the others and pairs well with fruit flavorings.

Organic Cane Sugar
Another very important ingredient of kombucha: sugar. We specifically recommend using organic cane sugar. It’s probably easiest to get some at your nearest grocery store, but if you prefer to buy in bulk, this is a good option.
Why organic? We always recommend using organic ingredients when possible.
A lot of times, organic is not cheap. In the case of cane sugar, we find the price very accessible.
Why cane sugar? Cane sugar is literally dehydrated juice that is squeezed from the sugarcane plant.
Organic cane sugar is unrefined and retains a lot of the nutrients present in the original juice. It’s the most natural, healthiest, and least processed option for sugar. These are all important things to consider for the health of the SCOBY.
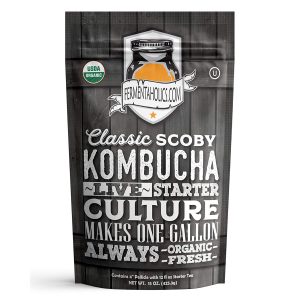
SCOBY and Starter Liquid
SCOBY is an acronym that stands for “symbiotic culture of bacteria and yeasts.” It’s the life force that gets the fermentation process jumpstarted! You will need a high-quality SCOBY.
While you can make your own SCOBY, it’s a process that takes about a month. If you are reading this article, you most likely want to get started brewing as soon as possible!
We recommend purchasing a SCOBY online or asking for one from a friend that already brews kombucha.
Make sure that your SCOBY comes with at least 1.5 cups of starter liquid. Starter liquid is unflavored kombucha that went through the first fermentation. You add it to your brew to help your batch quickly acidify and protect itself against mold.
More Recommended Equipment to Make Kombucha
More Recommended Equipment to Make Kombucha | ||||
 |  |  |  |  |
 |  | |||
In addition to the essential items listed above, we highly recommend the following supplies if you want the brewing process to be easier and more streamlined.

Thermometer Strips
While a kitchen thermometer does the job, we find these stick-on thermometer strips to be the perfect way to quickly and easily monitor the temperature of our brew.
Glass Pitcher
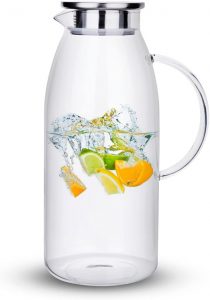
Pouring kombucha from a glass pitcher is much easier than pouring from a 1-gallon glass jar… not to mention much less prone to spills. Do yourself a favor and get a large glass pitcher if you don’t already have one in your kitchen. You will end up using it for a lot more than just kombucha!
Rubber Grippers
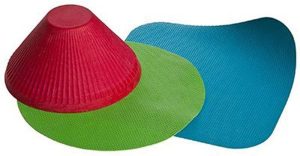
These help guarantee a super tight seal for your bottles during the second fermentation. It’s important for your bottles to be sealed tight in order to properly carbonate. If you don’t want rubber grippers, using a thin, dry dish towel will help give you a little more grip.

Bottle Brush
Significantly speed up the process of cleaning your bottles after you’ve enjoyed your wonderful booch!
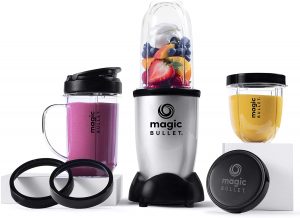
Blender
If you like to flavor your kombucha with fruit, we recommend creating purees or fresh juices. The yeasts have an easier time breaking down the sugars and converted them to carbon dioxide, creating a more carbonated beverage.
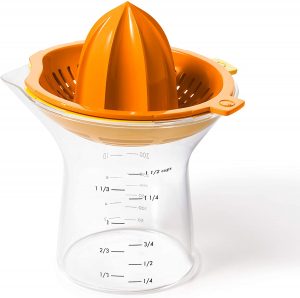
Juicer
Whether it’s electric or manual, a juicer is the perfect sidekick to a blender.
Glass Markers
Label and date your brewing vessels and bottles for better experimentation when brewing.
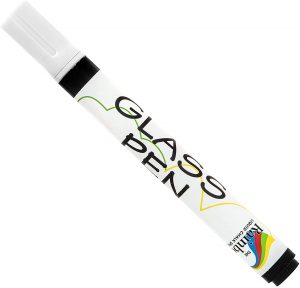
We prefer markers that are easy to wash off with a sponge.
Sharpies and other permanent markers tend to be very difficult and time-consuming to remove. Choose white if you aren’t sure what color to get! It shows up best for us.
Advanced Kombucha Brewing Supplies
Advanced Kombucha Brewing Supplies | ||||
 |  | |||
Do you want to take your brewing game to the next level? Maybe you want to brew several batches at once. Whatever your situation is, the following supplies will come in handy!
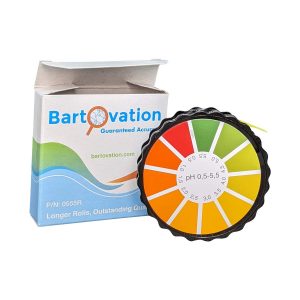
pH Test Strips
While knowing the pH of your brew doesn’t help you decide when your kombucha is done fermenting and ready to be bottled, it is important for some people to monitor the pH levels. These strips are an easy way to do that.
Electric Hot Water Kettle

Brewing a few batches simultaneously? Boil water faster with an electric hot water kettle.
Now that you have all of your equipment figured out and know what supplies you need, go brew your first batch of kombucha!
Happy brewing!
Full disclosure: this post contains affiliate links, and we earn fees on qualifying purchases made by using these links. Make Booch only recommends highly-reviewed products that we personally trust. If you don’t feel comfortable using these links, feel free to buy from wherever you’d like. No hard feelings – happy brewing!